How to Install Node.js and NPM on Windows, macOS, and Linux
How can I install Node.js and npm on Windows, macOS, and Linux?
Node.js is a powerful JavaScript runtime built on Chrome's V8 JavaScript engine. It allows developers to run JavaScript code outside of a web browser, enabling server-side scripting and the development of full-stack web applications using a single language. With its event-driven, non-blocking I/O model, Node.js excels in building scalable and high-performance applications.
npm (Node Package Manager) is the default package manager for Node.js. It provides a vast ecosystem of open-source libraries and tools that developers can easily integrate into their projects. npm simplifies the process of managing dependencies, sharing code, and building Node.js applications.
In this comprehensive guide, we'll walk you through the steps to install Node.js and npm on the three major operating systems: Windows, macOS, and Linux. Whether you're a beginner or an experienced developer, this guide will help you set up your development environment and start building Node.js applications in no time.
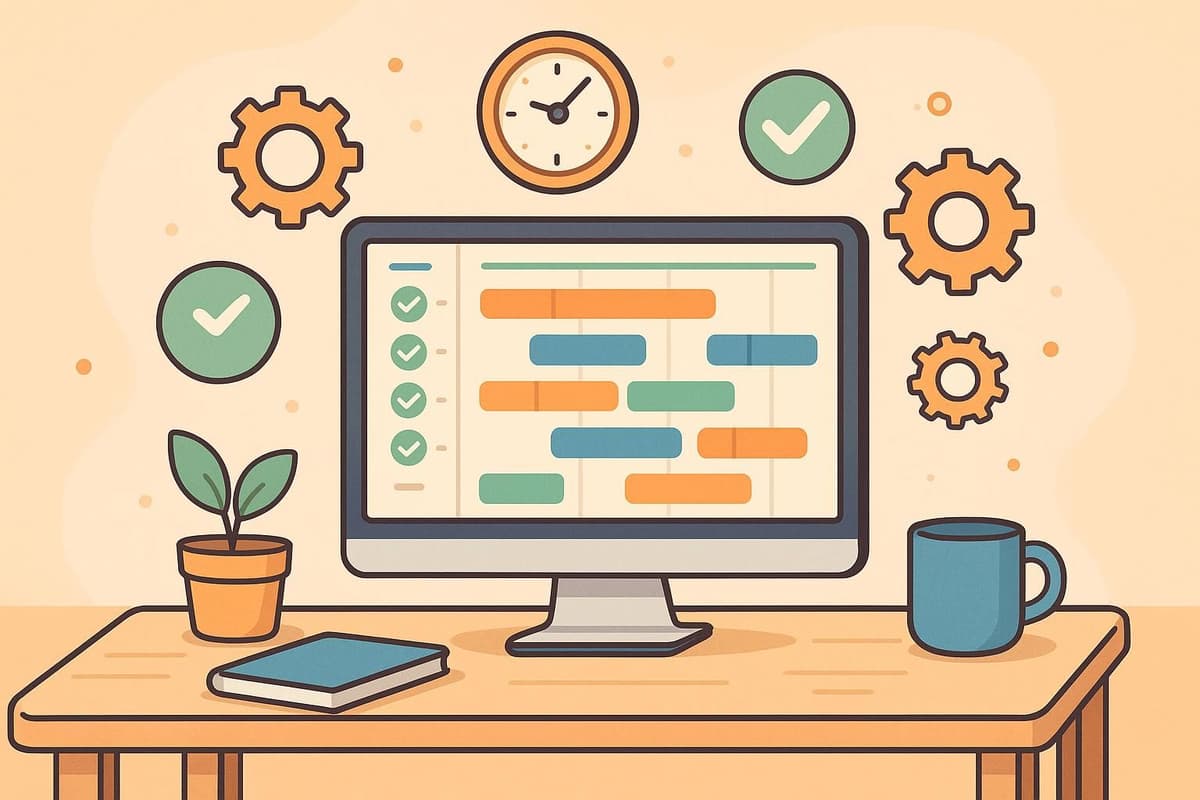
Key Takeaways: Node.js and npm are powerful tools for developing and managing JavaScript applications outside the browser, supporting cross-platform compatibility. Latenode enables the automation of managing Node.js and npm environments, including installation, updates, deployment, and monitoring of applications. The use of Node.js in companies like Netflix and Uber demonstrates its efficiency and scalability.
Optimize your Business Process on Latenode – the best Low-Code platform for you
What is Node.js?
Node.js is an open-source, cross-platform runtime environment that allows developers to execute JavaScript code outside of a web browser. It is built on top of the V8 JavaScript engine, which is the same engine used by Google Chrome. Node.js extends the capabilities of JavaScript by providing a rich set of built-in modules and APIs for file system access, networking, and more.
Key Features of Node.js
- Asynchronous and Event-Driven: Node.js uses an event-driven, non-blocking I/O model, making it lightweight and efficient. It can handle a large number of concurrent connections without the need for threading, making it well-suited for real-time applications.
- Single-Threaded: Node.js operates on a single thread, using event looping to handle multiple concurrent requests. This allows it to efficiently utilize system resources and handle a high volume of requests.
- Cross-Platform: Node.js is designed to be cross-platform, meaning it can run on various operating systems, including Windows, macOS, and Linux. This portability enables developers to write code once and run it on different platforms.
- Extensible: Node.js provides a modular architecture that allows developers to extend its functionality through the use of packages and modules. The npm registry hosts a vast collection of community-contributed packages, making it easy to find and integrate additional functionality into Node.js applications.
Advantages of Using Node.js
- Fast and Scalable: Node.js leverages the V8 JavaScript engine, which compiles JavaScript directly to native machine code. This, combined with its non-blocking I/O model, makes Node.js extremely fast and efficient in handling a large number of concurrent requests.
- Full-Stack JavaScript: With Node.js, developers can use JavaScript for both client-side and server-side development. This enables a unified language across the entire web stack, making it easier to write and maintain code, as well as share code between the client and server.
- Large Ecosystem: Node.js has a thriving ecosystem with a vast collection of packages and modules available through npm. This extensive library of resources allows developers to quickly build feature-rich applications without starting from scratch.
- Active Community: Node.js has a large and active community of developers worldwide. The community contributes to the growth and improvement of Node.js by developing new packages, providing support, and sharing knowledge through forums, blogs, and conferences.
Who Uses Node.js?
Node.js has gained widespread adoption across various industries and is used by many prominent companies and organizations. Some notable examples include:
- Netflix: Netflix uses Node.js for their streaming services and content management system.
- LinkedIn: LinkedIn relies on Node.js for their mobile backend infrastructure and real-time messaging functionality.
- Uber: Uber utilizes Node.js to power its massive ride-sharing platform and handle real-time data processing.
- PayPal: PayPal leverages Node.js for their web applications and payment processing services.
- NASA: NASA uses Node.js for data visualization and mission control systems.
These are just a few examples of the many companies and organizations that have embraced Node.js for its performance, scalability, and developer productivity benefits.
What is npm?
npm (Node Package Manager) is the default package manager for Node.js. It is a command-line tool that allows developers to install, share, and manage packages and dependencies for their Node.js projects. npm provides access to a vast registry of open-source packages contributed by the Node.js community.
Key Features of npm
- Package Management: npm simplifies the process of installing, updating, and removing packages in a Node.js project. It handles dependency resolution and ensures that the required versions of packages are installed.
- Dependency Management: npm allows developers to specify the dependencies of their project in a package.json file. This file lists all the packages required by the project, along with their respective versions. npm automatically installs and manages these dependencies, making it easier to share and collaborate on projects.
- Version Control: npm uses semantic versioning (semver) to manage package versions. It allows developers to specify version ranges for their dependencies, ensuring compatibility and stability across different versions of packages.
- Scripts: npm supports the definition of custom scripts in the package.json file. These scripts can automate common tasks, such as building, testing, and deploying Node.js applications.
- Global Packages: npm allows the installation of packages globally on a system. Global packages can be accessed from any directory and are often used for command-line tools and development utilities.
Components of npm
- Website: The official npm website (https://www.npmjs.com/) serves as a central hub for the npm ecosystem. It provides a searchable registry of packages, documentation, and resources for developers.
- Command-Line Interface (CLI): npm provides a command-line interface that developers use to interact with the npm registry, install packages, manage dependencies, and run scripts defined in the package.json file.
- Registry: The npm registry is a public database that hosts the packages and modules available for installation via npm. Developers can publish their own packages to the registry, making them accessible to the wider Node.js community.
Prerequisites
Before proceeding with the installation of Node.js and npm, ensure that your system meets the following requirements:
- Operating System: Node.js is available for Windows, macOS, and Linux. Make sure you have a supported version of one of these operating systems.
- Administrative Privileges: To install Node.js and npm, you will need administrative privileges on your system. On Windows, you should run the installer with administrator rights. On macOS and Linux, you may need to use the sudo command to execute certain installation steps.
- Internet Connection: An active internet connection is required to download the Node.js installer and npm packages from the official sources.
How to Integrate Node.js and npm with Latenode

Integrating Node.js and npm into your business processes can greatly enhance your development workflow, allowing for automated management of dependencies and streamlined deployment of applications. Latenode, a powerful automation and integration platform, simplifies these processes, making it easy to manage Node.js and npm tasks efficiently. This guide explores how to integrate Node.js and npm with Latenode and provides a comprehensive approach to leveraging its features.
Selecting Latenode as Your Integration Platform
Organizations choose Latenode for its robust capabilities, which include:
- Handling High Data Volumes: Efficiently manages large datasets, ensuring smooth operations.
- Support for Various APIs: Versatile support for a wide range of APIs, including those for Node.js and npm.
- Powerful Transformation Capabilities: Performs complex data transformations and applies business rules effectively.
Key Considerations:
- Number of Systems to Integrate: Assess the number of applications needing integration.
- Data Volume and Complexity: Evaluate the size and complexity of the data being transferred.
- Transformation and Business Rule Requirements: Determine specific data manipulations and business logic needs.
Connecting to APIs
Latenode simplifies API connections with its comprehensive library of pre-built connectors and adapters, allowing users to:
- Browse and Select Connectors: Access a variety of pre-built connectors for popular applications, including npm and Node.js registries.
- Configure API Credentials: Input necessary credentials and endpoint details for each API.
- Establish Secure Connections: Use OAuth, API keys, or other authentication methods for secure connections.
Mapping and Transforming Data
Latenode offers intuitive tools for data mapping and transformation:
- Visual Data Mappers: Utilize a drag-and-drop interface to define data mappings.
- Built-in Transformation Functions: Cleanse and restructure data using pre-built functions.
- Business Rules Application: Apply necessary business rules to ensure data consistency and integrity.
Building Integration Flows
Designing integration workflows is straightforward with Latenode’s drag-and-drop interface:
- Workflow Automation: Create workflows to automate data movement and transformation.
- Conditional Logic: Implement conditional logic to handle various data scenarios.
- Reusable Patterns: Design reusable integration patterns for common processes.
Deploying and Monitoring
After building integration flows, deploy and monitor them directly from Latenode’s interface:
- Real-time Monitoring: Track data flows in real-time.
- Error Handling: Automatically detect and handle errors.
- Alerts and Notifications: Receive notifications for integration issues.
- Detailed Logging: Access detailed logs for auditing and troubleshooting.
Integrating Node.js and npm on Latenode

This scenario demonstrates how to use Latenode to automate tasks related to Node.js and npm, such as updating packages, deploying applications, and monitoring server health. It covers the process of setting up Node.js environments, managing dependencies, and automating deployment processes.
Steps of the Scenario
- Scheduling: The workflow is scheduled to run at regular intervals to ensure Node.js environments and npm packages are up-to-date.
- Environment Setup: Use Latenode to configure the Node.js environment, ensuring the correct version is installed using NVM (Node Version Manager).
- Dependency Management: Automate the process of installing and updating npm packages by sending appropriate npm commands through Latenode.
- Application Deployment: Use Latenode to automate the deployment of Node.js applications to production servers, ensuring seamless updates and rollbacks if necessary.
- Health Monitoring: Implement monitoring tasks to check the health of Node.js servers, sending alerts if issues are detected.
- Error Handling: Automatically log errors and trigger corrective actions to maintain system stability.
Integrating Node.js and npm with Latenode optimizes your development and deployment processes, ensuring efficient management of dependencies and robust application performance. By following the steps outlined in this guide, you can leverage Latenode’s capabilities to automate and streamline your Node.js workflows.
Latenode offers a free platform to start automating your workflows. If you need help or advice on how to create your own script or replicate the example provided, join our Discord community where low-code automation experts are ready to assist you.
Try to Create your own Automation on Latenode – Low-Code Automation platform for you
Installing Node.js and npm on Windows
Follow these step-by-step instructions to install Node.js and npm on a Windows machine:
Step 1: Download the Node.js Installer
- Open a web browser and visit the official Node.js website: https://nodejs.org/
- On the homepage, you will see two download options: LTS (Long Term Support) and Current. It is recommended to choose the LTS version for most users, as it provides better stability and long-term support.
- Click on the Windows Installer button to download the installer file (.msi) for your system architecture (32-bit or 64-bit).
Step 2: Run the Node.js Installer
- Once the installer file is downloaded, locate it in your downloads folder and double-click on it to start the installation process.
- The Node.js Setup Wizard will open. Click the "Next" button to proceed.
- Review the license agreement and click the "Next" button to accept the terms.
- Choose the destination folder where Node.js will be installed. The default location is recommended for most users. Click the "Next" button to continue.
- On the "Custom Setup" screen, you can select the components you want to install. The default options are sufficient for most users. Click the "Next" button to proceed.
- If prompted, choose whether to install additional tools for native module compilation. This is optional and not required for most users. Click the "Next" button to continue.
- Click the "Install" button to begin the installation process.
- Wait for the installation to complete. This may take a few minutes.
- Once the installation is finished, click the "Finish" button to close the Setup Wizard.
Step 3: Verify the Installation
To verify that Node.js and npm are correctly installed on your Windows system, follow these steps:
- Open the Command Prompt. You can do this by pressing the Windows key + R, typing "cmd", and pressing Enter.
- In the Command Prompt, type the following command and press Enter:
Copy
node -v
This command will display the installed version of Node.js. - To check the npm version, type the following command and press Enter:
Copy
npm -v
This command will display the installed version of npm.
If both commands display version numbers without any errors, congratulations! Node.js and npm are successfully installed on your Windows machine.
Installing Node.js and npm on macOS
There are multiple ways to install Node.js and npm on macOS. We'll cover three common methods: using the official installer, Homebrew, and Node Version Manager (NVM).
Method 1: Using the Official Installer
Step 1: Download the Node.js Installer
- Open a web browser and visit the official Node.js website: https://nodejs.org/
- On the homepage, click on the macOS Installer button to download the installer file (.pkg) for your macOS version.
Step 2: Run the Node.js Installer
- Once the installer file is downloaded, locate it in your downloads folder and double-click on it to start the installation process.
- The Node.js Installer window will open. Click the "Continue" button to proceed.
- Review the license agreement and click the "Continue" button, then click "Agree" to accept the terms.
- On the "Installation Type" screen, click the "Install" button to begin the installation.
- You may be prompted to enter your macOS user password. Enter the password and click "Install Software" to continue.
- Wait for the installation to complete. This may take a few minutes.
- Once the installation is finished, click the "Close" button to exit the installer.
Step 3: Verify the Installation
To verify that Node.js and npm are correctly installed on your macOS system, follow these steps:
- Open the Terminal. You can do this by pressing Command + Space, typing "Terminal", and pressing Enter.
- In the Terminal, type the following command and press Enter:
Copy
node -v
This command will display the installed version of Node.js. - To check the npm version, type the following command and press Enter:
Copy
npm -v
This command will display the installed version of npm.
If both commands display version numbers without any errors, Node.js and npm are successfully installed on your macOS system.
Method 2: Using Homebrew
Homebrew is a popular package manager for macOS that simplifies the installation of software and tools. If you already have Homebrew installed, you can use it to install Node.js and npm.
Step 1: Install Homebrew
If you don't have Homebrew installed, follow these steps to install it:
Open the Terminal.
Copy and paste the following command into the Terminal and press Enter:
Copy
/bin/bash -c "$(curl -fsSL https://raw.githubusercontent.com/Homebrew/install/HEAD/install.sh)"Follow the on-screen instructions to complete the Homebrew installation.
Step 2: Install Node.js and npm using Homebrew
Once Homebrew is installed, you can use it to install Node.js and npm:
In the Terminal, type the following command and press Enter:
Copy
brew install nodeHomebrew will download and install the latest stable version of Node.js and npm.
Wait for the installation to complete. This may take a few minutes.
Step 3: Verify the Installation
To verify that Node.js and npm are correctly installed using Homebrew, follow these steps:
- In the Terminal, type the following command and press Enter:
Copy
node -v
This command will display the installed version of Node.js. - To check the npm version, type the following command and press Enter:
Copy
npm -v
This command will display the installed version of npm.
If both commands display version numbers without any errors, Node.js and npm are successfully installed using Homebrew.
Method 3: Using Node Version Manager (NVM)
Node Version Manager (NVM) is a tool that allows you to install and manage multiple versions of Node.js on the same system. It provides flexibility and makes it easy to switch between different versions of Node.js for different projects.
Step 1: Install NVM
To install NVM on macOS, follow these steps:
- Open the Terminal.
- Copy and paste the following command into the Terminal and press Enter:
Copy
curl -o- https://raw.githubusercontent.com/nvm-sh/nvm/v0.39.1/install.sh | bash
This command will download and install NVM. - Close and reopen the Terminal for the changes to take effect.
Step 2: Install Node.js and npm using NVM
With NVM installed, you can now install Node.js and npm:
- In the Terminal, type the following command and press Enter:
Copy
nvm install node
This command will install the latest stable version of Node.js and npm. - To install a specific version of Node.js, you can specify the version number. For example, to install Node.js version 14.15.0, use the following command:
Copy
nvm install 14.15.0
Step 3: Verify the Installation
To verify that Node.js and npm are correctly installed using NVM, follow these steps:
- In the Terminal, type the following command and press Enter:
Copy
node -v
This command will display the installed version of Node.js. - To check the npm version, type the following command and press Enter:
Copy
npm -v
This command will display the installed version of npm.
If both commands display version numbers without any errors, Node.js and npm are successfully installed using NVM.
Installing Node.js and npm on Linux
The installation process for Node.js and npm on Linux may vary depending on the distribution you are using. We'll cover the installation steps for Ubuntu, a popular Linux distribution.
Step 1: Update the Package List
Before installing Node.js and npm, it's a good practice to update the package list to ensure you have the latest versions available. Open the Terminal and run the following command:
Copy
sudo apt update
Step 2: Install Node.js and npm
There are two common methods to install Node.js and npm on Ubuntu: using the apt package manager or using the official Node.js binary distributions.
Method 1: Using the apt Package Manager
In the Terminal, run the following command to install Node.js and npm:
Copy
sudo apt install nodejs npmThe apt package manager will download and install Node.js and npm along with their dependencies.
Once the installation is complete, you can verify the installed versions by running the following commands:
Copy
node -v
- npm -v
Method 2: Using the Official Node.js Binary Distributions
- Visit the official Node.js download page: https://nodejs.org/en/download/
- Under the "Linux Binaries" section, download the appropriate binary for your Ubuntu version (32-bit or 64-bit).
Extract the downloaded archive to a location of your choice. For example, you can create a directory called "node" in your home directory and extract the archive there:
Copy
mkdir ~/node
- tar -xf node-v14.15.0-linux-x64.tar.xz -C ~/node
Replace "node-v14.15.0-linux-x64.tar.xz" with the actual filename of the downloaded archive. - Add the Node.js binary directory to your system's PATH variable. Open the ".bashrc" file in your home directory using a text editor:
Copy
nano/.bashrc/node/node-v14.15.0-linux-x64/bin
Add the following line at the end of the file:
Copy
export PATH=$PATH:
Replace "node-v14.15.0-linux-x64" with the actual directory name from step 3. - Save the file and exit the text editor.
- Reload the ".bashrc" file to apply the changes:
Copy
source ~/.bashrc
Verify the installation by running the following commands:
Copy
node -v
- npm -v
If both commands display version numbers without any errors, Node.js and npm are successfully installed on your Ubuntu system.
Updating npm
npm is regularly updated with new features, bug fixes, and performance improvements. It's recommended to keep npm up to date to take advantage of these updates. To update npm to the latest version, you can use the following command:
Copy
npm install
-g npm@latest
This command will install the latest version of npm globally on your system. The `-g` flag indicates a global installation, which means npm will be updated system-wide.
Note that you may need to run this command with administrative privileges (e.g., using `sudo` on Linux and macOS) if you encounter permission issues.
After running the update command, you can verify the updated npm version by running:
npm -v
Setting the NODE_HOME Environment Variable
The `NODE_HOME` environment variable specifies the directory where Node.js is installed. Setting this variable can be useful in certain scenarios, such as when using Node.js with other tools or when multiple versions of Node.js are installed on the same system.
On Windows
- Open the Start menu and search for "Environment Variables".
- Click on "Edit the system environment variables".
- In the System Properties window, click on the "Environment Variables" button.
- Under "System variables", click on the "New" button.
- Enter `NODE_HOME` as the variable name and the path to your Node.js installation directory (e.g., `C:\Program Files\nodejs`) as the variable value.
- Click "OK" to save the changes.
On macOS and Linux
- Open the Terminal.
- Open the shell configuration file in a text editor:
- For Bash: `nano ~/.bashrc`
- For Zsh: `nano ~/.zshrc`
- Add the following line at the end of the file:
export NODE_HOME=/path/to/node
Replace `/path/to/node` with the actual path to your Node.js installation directory.
- Save the file and exit the text editor.
- Reload the shell configuration file:
For Bash: `source ~/.bashrc`
For Zsh: `source ~/.zshrc`
After setting the `NODE_HOME` environment variable, you can access it in your scripts or command-line tools that rely on Node.js.
Conclusion
In this comprehensive guide, we covered the installation process for Node.js and npm on Windows, macOS, and Linux. We explored different methods, including using the official installers, package managers like Homebrew, and version managers like NVM.
By following the step-by-step instructions provided, you should now have Node.js and npm successfully installed on your system. This opens up a world of possibilities for developing server-side applications, command-line tools, and more using JavaScript.
Remember to keep Node.js and npm up to date to benefit from the latest features, performance improvements, and security fixes. You can use the npm update command to easily update npm to the latest version.
As you embark on your Node.js development journey, make sure to explore the vast ecosystem of npm packages available. The npm registry hosts a wide range of packages and modules that can help you streamline your development process, add new functionalities to your projects, and leverage the work of the vibrant Node.js community.
Happy coding with Node.js and npm!
Optimize your Business Process on Latenode – the best Low-Code platform for you
FAQ
1. What is the difference between the LTS and Current versions of Node.js?
The LTS (Long Term Support) version of Node.js is recommended for most users. It provides a stable and reliable platform for building and deploying applications. LTS versions receive bug fixes and security updates for an extended period, typically 18 months.
On the other hand, the Current version of Node.js represents the latest features and improvements. It is suitable for users who want to experiment with the newest functionalities and don't require long-term stability. Current versions have a shorter lifespan and are typically supported for 6 months.
2. Can I have multiple versions of Node.js installed on the same system?
Yes, you can have multiple versions of Node.js installed on the same system. Tools like Node Version Manager (NVM) make it easy to install and switch between different versions of Node.js. NVM allows you to install and manage multiple Node.js versions side by side, enabling you to work on projects with different Node.js requirements simultaneously.
3. Do I need to install npm separately?
No, you don't need to install npm separately. When you install Node.js using the official installer or package managers like Homebrew, npm is automatically installed along with Node.js. npm is bundled with Node.js and is ready to use once the Node.js installation is complete.
4. How can I update Node.js to a newer version?
To update Node.js to a newer version, you can follow these steps:
- Visit the official Node.js website (https://nodejs.org) and download the installer for the desired version.
- Run the installer and follow the installation prompts, similar to the initial installation process.
- The newer version of Node.js will be installed alongside the existing version.
- To switch between versions, you can use a version manager like NVM or update the system's PATH variable to point to the desired version.
Alternatively, if you used a package manager like Homebrew to install Node.js, you can use the package manager's update command to upgrade to a newer version.
5. What should I do if I encounter permission issues during the installation?
If you encounter permission issues during the installation of Node.js or npm, try the following:
- On Windows, make sure you are running the installer with administrator privileges. Right-click on the installer file and select "Run as administrator".
- On macOS and Linux, use the `sudo` command to run the installation commands with administrative privileges. For example, `sudo apt install nodejs npm` on Ubuntu.
- If you are using NVM, ensure that you have the necessary permissions to install and manage Node.js versions in the NVM directory.
If the permission issues persist, consult the documentation or support channels specific to your operating system for further assistance.
Remember, if you have any further questions or encounter any issues during the installatin process, don't hesitate to reach out to the Node.js community or refer to the official Node.js documentation for more detailed information and troubleshooting steps.